 |
| Photo by Maja Cadez The jewelry is no longer measured, as before, by the precious material it is made from. Now jewelry is converted to an object of desire because of its design. María Luisa Guerrero Gónzalez |
It´s not about gold and diamonds anymore. The new wave of jewelry puts the design and creativy before the price of the material. Jewelry can be created from everything. There are no limits. This opens a whole new field of oportunities and our trainer María Luisa gave us a glimpse of what can it mean.
As it is a very creative process, we will not give you a description of a specific piece of jewelry. We will just explain you the steps you can take and the ways you can play with your old CDs. How you use this knowledge is up to you, but we believe that the craziest ideas are the best.
So, if you have a pile of old CDs, you can:
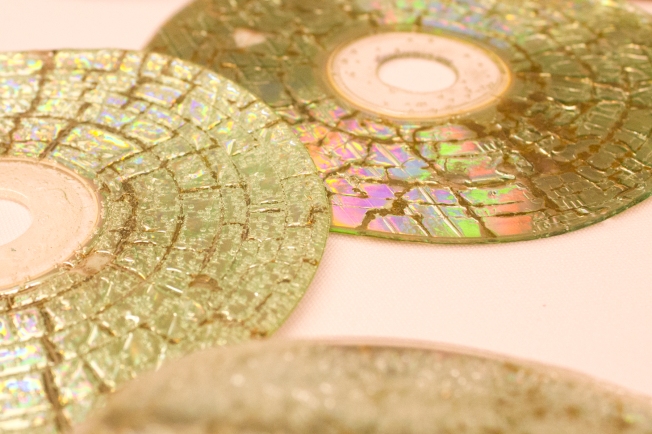
1. Put them in microwave:
The aluminium foil of CDs is sensitive to the electromagnetic waves emitted by the microwave. It generates drawings and colour changes in the CDs and DVDs.
Introduce the CD or DVD in the microwave and give it a few seconds of exposure. Don´t be afraid of the noice and lights in the oven - it´s normal.
Depending on the brand of CD, the colours generated will be different, so try different brands and see what you can come up with.
Please take into account that the microwave you use for burning CDs should not be used for cooking any more. We suggest you to find a cheap second hand microwave oven and use it just for CDs (and other non-food items you want to microwave).
Depending on the brand of CD, the colours generated will be different, so try different brands and see what you can come up with.
 |
| Foto: Montserrat Guirado Microwaved CDs |
 |
| Photo: Maja Cadez A necklace made by María Luisa Guerrero Gónzalez from microwaved CDs |
2. Use oven.
Prepare the cd for welding.
Take off the metal part with a scissors or cutter, (do not use microwave). Again, experiment to find the best CD brand for scratching. Some of them are pretty resistant, while others can be made transparent in a minute.
 |
| Photo: Mairita Luse That´s how a transparent CD should look |
Use this base to weld CDs together.
A CD can be welded to another, if the polycarbonates touch polycarbonates (plastic part of one CD touches the plastic part of the other CD). When exposed to high temperatures in the oven or hot air gun, the two polycarbonate parts that touch each other become one.
There are different options for welding: 2 transparent CDs, two CDs manipulated in microwave, one transparent and the other one not.
The exposure time depends on the oven and if it heats uniformly or not. You should establish performance parameters by conducting some tests with small pieces.
It is interesting to overexpose CDs as well, as it tends to generate interesting results, for example, more or less visible bubbling, and can be useful for composition and creation.
It is essential to use a Teflon sheet as a protection for the oven tray. This film withstands high temperatures and is non-stick. We can also use specific silicone protection tools.
Any explanations needed? You can make any shape or earrings, medallions, ornaments etc...
You can paint one CD, then out another, transparent one, on it. Thus you will incude your painting between the two CDs. Some colours will make a bump in your CD (markers, for example). Other will leave it flat.
Some things to take into account:
The exposure time depends on the oven and if it heats uniformly or not. You should establish performance parameters by conducting some tests with small pieces.
It is interesting to overexpose CDs as well, as it tends to generate interesting results, for example, more or less visible bubbling, and can be useful for composition and creation.
.JPG) |
| Photo: Dinu Madalina A ring made from overexposed CD |
It is essential to use a Teflon sheet as a protection for the oven tray. This film withstands high temperatures and is non-stick. We can also use specific silicone protection tools.
 |
| Photo: Dinu Madalina This is how we inserted our pieces in the oven |
3. Cut you CD in any shape you want
Any explanations needed? You can make any shape or earrings, medallions, ornaments etc...
4. Paint your CD
You can paint one CD, then out another, transparent one, on it. Thus you will incude your painting between the two CDs. Some colours will make a bump in your CD (markers, for example). Other will leave it flat.
 |
| Photo: Mairita Luse Earrings made by Uros Cadez. Painting by a marker. |
5. Include something between the two CDs before putting them in the oven
When welding one cd with another, you can include images or objects that are not too massive between the CDs. They will stay embedded after the impact of the oven.
 |
| Photo: Mairita Luse A ring made by Laura Rate. Take a look at the seashell and how it is included between two pieces of CD |
6. Make your CD in 3D
A mediating element can be used to generate a kink or bend in the cd, but it is very important that it does not adhere to the surface, if it is not included our plans.
7. Perforate your CD.
Perforations can be done with drills of a diameter adjusted to the result you want to obtain. Small hand or electric drills can be used. Always put a block of wood under the piece you want to drill in order to prevent damage and injuries.
8. Give your piece the final touch.
To remove peaks or edges that could scratch, use a rasp or sandpaper and smooth the finished piece. Use finer and finer sandpaper to achieve smoother result.
It is possible to put the piece in the oven one more time. It can be used in case of undesirable scratches and can make the material transparent once more.
Use any ¨normal¨ do-it-yourself jewelry tools, such as earring hooks, wires, clasps, hot glue etc.a
Use any ¨normal¨ do-it-yourself jewelry tools, such as earring hooks, wires, clasps, hot glue etc.a
9. Prevent problems
It is very important to plan and organize the work well, as changes in the order of steps can restrain the creation of the piece you have imagined.
 |
| Photo: Mairita Luse This post would not be complete without this necklace containing flags of almost all participant countries made by Alamir Ibrahim. The sweetest piece made during this workshop! |

0 comentarios:
Publicar un comentario