The first workshop during our training course was a smelly one - we made soap from used cooking oil. Don´t be afraid to try it at home. As our trainer, Esperanza, said: soap making is easy, even if the process can take some time.
I knew plastic bottles are bad... but oil?
Even if it is not a well known fact, each liter of used oil contaminates more than 1,000 liters of water. If the oil reaches the river, it forms a sheet that limits oxygenation process and can kill fish and aquatic plants. In addition, the cleaning process is very expensive, so it increases the costs of maintaining public sewers and water treatment plants. Thus, this is money that cannot be used for other important things, such as health, education, etc. Oil that is flushed down the sink can also clog our pipes, so we end up spending money on unblocking.
So, what can I do?
Each time you cook something with oil or eat oil-based conserves (tuna, for example), put the oil left-overs in a jar. It does not have to be completely clean - the food particles than tend to stay in the oil after frying goes in the jar as well. It´s normal and they will stay in the bottom of the jar anyway and you will not use it.
When your jar is full, you have two options - either bring the jar to the oil recollection point (its exact name and availability depends on your country) or - make your own soap.
Making Soap
Our trainer started with explaining us the chemical base of soap making and the process of saponification. Feel free to look it up if you are interested. In this entrance we will keep it short and simple -we´ll talk just about the soap making process itself.
During the training course we made soap bars that can be used for washing ones clothes. The oil we used was retrieved from various restaurants and bars. As we noticed, they tend to use their oil for many ,many times. Even too many, some of us thought. Even if we left the food traces in the jars and used just the clean part of the oil (as should you), soap made from oil used so many times should not be used to wash your body. When you collect oil in your home and it is not so contaminated as the one we had to work with, feel free to use it for your body as well.
What do you need?
- Plastic bucket for mixing (it can be a metal one, but never aluminum one because of the strong reaction it has with soda).
- Stick or wooden spoon used to move the mixture.
- Weights and a measuring cup to measure quantities.
- Gloves to protect our hands from the corrosive effects of soda.
- Mask to protect against fumes created when soda is mixed with water.
- Water: it should be as soft as possible, i.e., having as low amount of dissolved salts as possible. It is recommended but not essential to use distilled water. If not, filtered and boiled water from well or rainwater will do as well. The next option is bottled water (weak mineralization) and finally the water from tap. The reason behind is that for the dissolution of another substance the purer the water, the better the process.
- Used oil: any fat on we can use, for example, the excess oil from the fryer, the one from frying pan used for frying fish, meat, eggs, the leftover oil from canned conserves, etc.
- Sodium hydroxide, also known as lye or caustic soda: it must be as pure as possible. The degree of purity is usually identified on the packaging. You will often wind NaOH (caustic soda) of 99%. You can also find one at 50% but it, of course, is much less desirable, as you will have to make up that difference by adding more soda.
- Recycled plastic containers for the molds.
How much oil and soda should I use?
This is the moment where the saponification table comes in handy. The proportion of soda and oil used will depend on the oil. The calculations are simple: according to this table, in order to make soap 1 liter of olive oil reacts with 134 grams of soda; 1 liter of coconut oil reacts with 190 grams of soda, etc.
Table of basic saponification values
|
|
0,134 Olive oil
0,190 Coconut oil
0,141 Palm oil
0,124 Sunflower oil
0,128 Castor oil
0,136 Almond oil
0,133 Avocado oil
0,135 Soy oil
|
0,136 Corn oil
0,133 Sesame oil
0,069 Jojoba oil
0,126 Palm kernel oil
0,132 Wheat germ oil
0,069 Bee wax
0,137 Cocoa butter
0,128 Shea butter
|
Each of used 400 grams of water + 75 grams of soda + 0,5 liters of used olive oil.
Preparation:
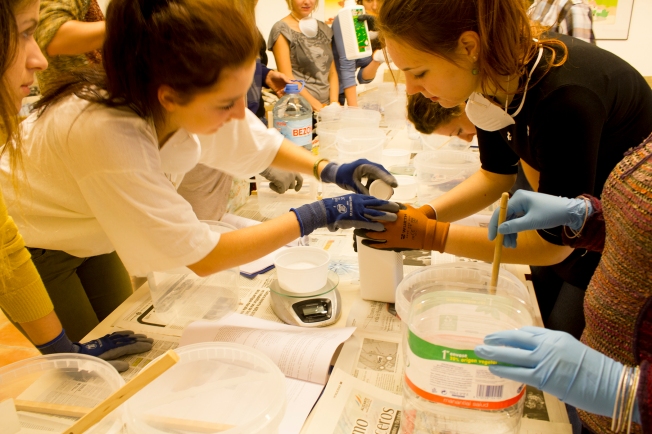
1. Weigh water and soda, mix gently (avoid the vapors rising from the
mixture, use gloves and mask if necessary, as the mix irritating to the touch
and burn), and move until the soda is completely dissolved. The mixture of
these two components produces an exogenous reaction and therefore the solution
will be hot. (We can allow the solution to cool or heat the oil in order to
achieve the same temperature of both ingredients when mixed).
As the day was sunny, we mixed these two ingredients outside. Thus the place we worked stayed clean and vapor-less.
 |
| Photo: Montserrat Guirado |
ATTENTION: in case of direct contact with soda, wash well the area with water and put vinegar on it. If the soda reaches the eyes try to wash them with water and seek immediate medical attention.
2. Pour
the mixture of soda and water slowly in the oil. I is very important to move it in the same direction
and at constant speed.
 |
| Photo: Marielle Velander
In this photo you can see the difference between how the mix should look like (on the right - light and creamish)... and how should it not (on the left - not uniform and yellowish).
|
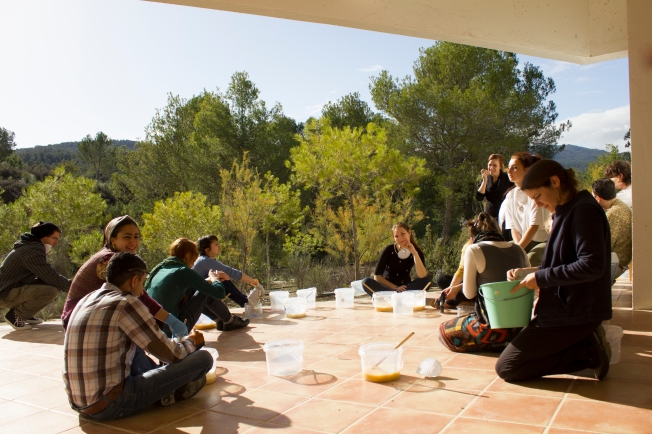
3. The
mass has to be moved every 15min for about 5 minutes with a wooden spoon. The
time it takes is undetermined and can range from 1 to 3 hours. As the day was sunny, we stayed outside, mixed our soap and chatted.
 |
| Photo: Montserrat Guirado |
To help accelerate the reaction a hand mixer can be used, but just when
the spoon is already used for 3 or 4 times.
Your soap is ready for molding when it becomes thicker, a bit like condensed milk. You´ll know when you see it.
As we used oil from different sources, some of us finished this step quite soon, for some it took a bit longer. And then for some of us the mass just kept on being liquid. If it happens with you, follow Esperanza´s advice - mix the soap with love and with time it will become thicker. Allow it to rest for an hour or so, then mix it again. The differences in time this step takes can be explained with different oil quality, mixing it in direct sunlight and other factors. In the end, all of our soaps turned out fine, so your´s will too!
 |
Photo: Mairita Luse
The group whose soap needed some extra time... and love.
|
4. Place
the liquid into molds (any plastic container can be used, taper, fresh cheese containers,
yogurt, custard etc.). Allow it to harden for 24 to 48h.
 |
| Photo: Montserrat Guirado |
5. When the time required to harden has passed, remove the mould and cut
the soap, if necessary, making the soap pieces of the size of your choice.
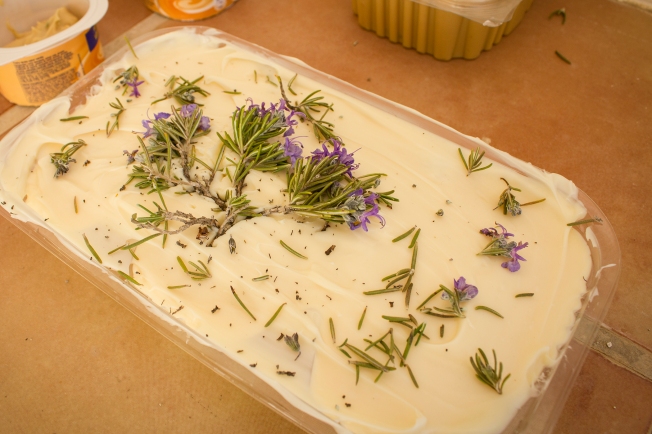
Be creative
- For more sophisticated result you can substitute water with juice or herbal teas
- Add spices or herbs to your soap (it should be done directly before putting the soap in the molds)
- Decorate your soap! We used fresh rosemary we found outside. As it was fresh, it will loose it colour. If you use already dried herbs, they will stay green.
- Add aromas and cosmetic essences to your soap
 |
| Photo: Liene Berzina Chamomile soap with honey, dark chocolate soap and cinnamon soap cake, mmm... They smell so good! Don't they really look delicious? (Liene Berzina) |

0 comentarios:
Publicar un comentario